Month: December 2020

Reviving The Deadlift

Reviving The Deadlift

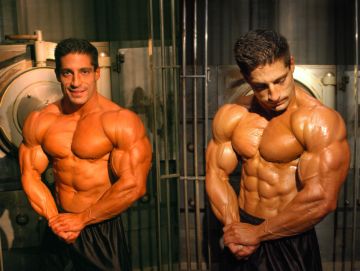
Reviving The Deadlift – Throughout my career as a bodybuilder, people have been quite intrigued with my back development. This became apparent to me the day I stepped on stage as an amateur bodybuilder in the INBF. I remember a particular occasion backstage at the 2004 INBF NaturalMania where a few athletes anxiously hit me up with rapid-fire questions as to how I built it.

I will never forget the looks on their faces, as they practically went into a state of shock when I told them that I did not incorporate deadlifts into my routine, nor had I ever at any point throughout my training endeavors. These guys must have been master salesman because they opened my mind to consider that the addition of this exercise would advance the overall thickness of my back beyond belief. So, from that point on, for about one year, I made the standard deadlift a staple in my back routine. And let me tell you, even with sound form, I was hammering away with nearly 500lbs! judi online

The overwhelming excitement of believing that my back would grow to sickly proportions caused me to pay very close attention to my progress. However, a dark cloud would soon smother my optimism, as deadlifts did nothing more than enhance the development of my erectors, but at the expensive of a noticeably wider waist. And my lats and traps? …they didn’t progress even close to their prior pace! judi bola

Worst of all, I acquired one of only two major injuries throughout my bodybuilding career during a set of standard deadlifts – and it was a devastating one! I ruptured a disc in the lumbar region so badly that it damaged nerves and caused my right leg to shrivel to the size of a marathon runner. After a lengthy rehabilitation process, I was fortunate to make a sufficient recovery and continue on my quest to make a mark in the bodybuilding world. https://americandreamdrivein.com/

Reviving The Deadlift

The whole experience moved me to delve into the reasoning behind the efficacy of the deadlift. It seems that the movement can either make or break you in your quest to build a world class physique, with this being determined based on the underlying purpose for utilizing it.

Generally, I find that the standard deadlift is a sound exercise for the spinal erectors, glutes, and hamstrings. And although it contradicts the vast majority of mainstream training literature, you would do yourself a great deal of justice to stop viewing the deadlift as an overall back developer, particularly at the advanced level of bodybuilding!

During the beginning and early intermediate phases of resistance training, the standard deadlift can be effective as a basic compound movement. The inclusion of multiple muscle groups will allow one to use a great deal of weight and add a base of muscle across the back region, improve neurological networks to increase muscular coordination, and aid in establishing a sound “mind-muscle connection.”

Like the squat, the deadlift will create a synergistic total body strengthening effect that will allow you to rapidly excel in virtually every other movement if you are in this phase. The primary reason that it can no longer be used for this as you approach the advanced level is because progression toward region-specific movements will have led to maxing out the strength of every muscle in the body.

Correspondingly, the upper back muscles can lift substantially more weight than those in the lower back. This is relevant in that the vast majority of stress throughout the movement is focused on the lower back, which is basically a weak hinge amidst incredibly powerful glutes, quads, hamstrings, lats and traps, thereby limiting the poundage lifted to the capacity of this region and making it very susceptible to injury.

The deadlift is somewhat analogous to a power-clean in that you are working many muscles at one time. At the advanced level of bodybuilding, you can no longer rely on power cleans to maximize the development of the shoulders, quads, back, triceps, etc. Instead, this exercise must evolve into many different workouts and movements so that you can thoroughly target and stimulate each muscle group with sound principles, such as constant tension.

This is why the bodybuilding world commonly recommends compound movements that are more region-specific, such as the barbell row, for the purpose of maintaining tension on an isolated area of muscle fiber. On a smaller scale, this same rationale applies to the standard deadlift, as you can no longer rely on a single exercise to thoroughly fatigue the entire back…and that, my friends, is highly understated!

Have you ever reflected upon the parts of your body that get pumped when performing standard deadlifts? If so, you will note that your lower back and glutes are pumped far beyond your lats and traps. Actually, I find very few that get any sort of pump at all in these muscles, especially the lats. Now, if you use the localized pump and soreness to help gauge the degree of stimulation produced by every other exercise, why would you not do the same to assess the effectiveness of the standard deadlift as an overall back developer?

Okay, I’ll admit it. The bodybuilding world is full of speculation and you can’t believe everything you hear. So, let’s put all speculation aside for a moment and consider the practical science behind the movement. If you have a basic understanding of muscular stimulation with respect to the line of pull and analyze the standard deadlift along these lines, you will note that fiber recruitment makes dramatic shifts to different parts of the back throughout the range-of-motion (ROM). The initial portion is similar to that of a T-Bar row and so you will feel the lats contract. As you gradually extend the body, the emphasis transfers to the mid to upper trap region, and upon approaching the upright position, the stress is placed entirely onto the upper traps. And all throughout the entire movement, you violate the constant tension principle…

The lats function and develop by pulling and adducting the upper arms from the upright position in toward the body, and they must be pounded throughout their full ROM. A simple shrug-like contraction at the bottom of a deadlift will not suffice – not even close! Likewise, what do you think is better for your mid to upper trap region, subjecting them to resistance in near-isometric fashion for a second or shrugging and retracting the shoulders through a respectable ROM for a minute or more while maintaining constant tension? Are these not the same rules that you adhere to when working to maximize hypertrophy of every other muscle?

Simply put, the glutes, quads, and hamstrings play a large part in the usage of so much weight during the standard textbook deadlift. The synergy produced by this would be of great benefit if the lats and traps worked through a sufficient ROM for it to be effective, but they don’t. In fact, if you think about it, the only muscles in your upper body going through a full ROM, or any respectable degree of motion for that matter, are the erector muscles! The bottom line is that the deadlift cannot tax the lats and traps nearly as well as a pull-up, barbell row, and shrug combo!

I am not trying to kill the deadlift as a key movement– far from it! You simply need to observe my routine to find that I deadlift on a regular basis. My intent is to broaden your mind with respect to its implication and help you establish order when using it relative to your goals. Reaping the full benefits of the movement will demand that you view the exercise in a different light if you desire to maximize your potential at the advanced level of muscular development.

The message here is twofold. First, the idea of it being an overall back developer, and especially as one of the premier movements for the lats, should be tossed out the window, and especially if you are an advanced level physique athlete. Second, you will find it expedient to view the standard textbook deadlift variation as a prototype of sorts. This does mean that the standard variation will rarely, if ever, find a place in your regimen, as there are ways to modify and improve its effectiveness relative to maximizing stimulation of the target muscle. For example, sumo style or partial deadlifts, variations that considerably reduce lower back involvement and allow for the usage of significantly more weight, are much more effective to experience mid-upper trap development and increase the overall strength of the body. Because this article is devoted to back development, I will simply state that every other version should be geared around the glutes, hamstrings, and spinal erectors, adapting your form to put any one of these muscles through a greater ROM.

If you are as cautious as I am with regard to muscular development, chances are that you won’t trash the standard deadlift as a result of the reasoning provided in this article, with this becoming even more difficult if you have a big back and perform them on a regular basis. This is very understandable, but such caution should also arouse you to probe more deeply into the matter. Once you do, you too will find the standard deadlift to be both dangerous and pointless for upper back development at the advanced level, especially given the countless other tools at your disposal. You might also find that the bulk of your back development has come about as the result of pulling, shrugging, and retraction style movements, with the key to accelerating your progress being to rely on these movements, while leaving the standard deadlift to RIP!

Continue reading
Olympian Quads

Olympian Quads

Olympian Quads – Nothing looks more ridiculous than a powerful upper body that rests on a pair of under developed legs. Take it from me, as I seek to save you from the embarrassment of learning this the hard way! If you find that you are lagging behind in any particular region of the quadriceps, that is about to change.

Assuming that you are willing to take some pain, this article will provide you with the game-plan needed to blast each of the four muscles into submission, putting you on the path toward developing a pair of quads so mighty that the Greek gods themselves will bow down before you and shudder! agen bola

Some believe that region-specific quad training is impossible, and in one sense, I can’t blame them. When you reflect upon their basic function, it is reasonable to draw such conclusions. The attachment points and belly length (of three of the four quad muscles mostly activated when pressing) is unaffected regardless of how you rotate the legs to form a given stance and they extend the lower leg along a single axis. sbobet365

So, what’s the point of utilizing various stances or movement pathways? All speculation aside, the answer to this will require a basic analysis of muscular anatomy and training dynamics, while keeping the core bilateral movements in mind, namely squats and leg presses. www.americannamedaycalendar.com

Olympian Quads

It should spark your curiosity as to why such an intricately configured muscle group is needed to extend the lower leg. The fiber course in each of the four quadriceps muscles is very unique relative to one another, and each contracts and pulls on the quadriceps tendon from different directions.

The fiber of the vastus lateralis and medialis run obliquely, virtually opposing each other, while the split-fiber direction of the rectus femoris possesses both of these characteristics. Interestingly, only one of the four muscles, the vastus intermedius, runs in linear fashion up the femur. This alone hints toward the idea that you can place more emphasis on one muscle over the other.

Generally speaking, whenever you perform squats or leg presses, the force of the weight remains constant, moving along a fixed path. The stress is distributed to the appropriate muscles in the proportion necessary to generate a counter-force that pushes in the opposite direction.

There will be a mechanical advantage for some muscles over others based on both foot placement and movement pathways. For example, the muscles recruited when pressing with the legs flared will be different than those called upon when pushing with the legs parallel to each other. This will become clearer as we finally move on to practical application.

Of the four quads muscles, a well-developed vastus lateralis (outer quad) and vastus medialis (teardrop) appear to be the most coveted. The fiber makeup of these two muscles angle in near-opposition to each other, pulling across the knee joint accordingly.

This implies that they work hand-in-hand to stabilize the knee or else one of the two muscles would rip the lower leg out of the socket. In one sense, this scenario is very much like performing a cable low row, as both of your forearms angle in toward the waist and yet the cable moves forward in a single direction.

The knee joint is often described as a ‘modified hinge joint,’ since it allows for a slight lateral and medial rotation. This is important because it reveals that the knee was designed to endure a stronger pull from either the teardrop or outer quad, implying that you can shift more tension to one of these muscles over the other. The foundational component behind activating both of these muscles to the extreme entails squatting or pressing with the knees pointed out.

Vastus Medialis: Whenever the legs are flared wide and the feet are planted, the teardrop will be working hard to pull the knee in toward the midline of the body. To enhance stimulation, allow the knees to point out as widely as possible before too much tension builds in the hips upon bending the legs at roughly 90-degrees at the bottom of squats and presses.

The teardrop works very hard from this point all the way to near-lockout. It is therefore highly beneficial to focus on the top portion of the ROM.

Now here is where it gets tricky. You must pay attention to your execution. To toast the teardrop, you will want to perform a sort of extension-like style of repetition. Some find that pushing with the heel will aid in the contraction.

However, the key point of focus will be on the knees, as they travel from the flared position toward the midline of the body. Frequent execution of a slow and controlled rep cadence is recommended when working the teardrop, especially since it is one of the primary stabilizers of the knee.

Vastus Lateralis: Things are quite different when it comes to specialized emphasis of the outer quads. For starters, the legs should not flare out to the same degree that you would use to place emphasis on the teardrop. A safe bet is to place the feet at roughly shoulder-width, pointing the toes out a bit.

You will not want the knees to move toward the midline of the body to avoid shifting the tension to the teardrop, which usually occurs during the final quarter of the ROM of presses and squats. Therefore, you will want to focus more on the bottom half of the ROM. The outer quad is designed for power and so an explosive rep scheme will place a considerable amount of stress over to this region.

Remember, the teardrop and outer quad work very close together. Placing more stress onto one region over the other necessitates that you focus on the three key form components, namely, the pathway of travel, rep tempo, and ROM. To experiment, choose a single exercise.

Perform three sets with a powerful “piston-like” cadence, stopping a quarter short of lockout, while using a shoulder-width stance for three sets. Follow that up with three more sets using a slower tempo, a wider flare to the legs with a focus on bringing the knees to the midline of the body, while remaining within the upper three-quarters of the ROM. Without a doubt, both the emphasis and pump will shift from the outer quads to the teardrop.

Vastus Intermedius: The vastus intermedius lies underneath the rectus femoris and runs down the femur. It is the only muscle in the quads with a (near) linear fiber course from origin to attachment. As this muscle grows, it will indirectly enhance the appearance of the rectus femoris by pushing it out more.

You will find data supporting that this muscle is strongly recruited at the bottom of a squat or leg press and my own experience agrees with it.

The vastus intermedius will receive the greatest amount of stress when the feet are placed close together so that the legs travel near-parallel to each other throughout the movement, with the upper legs coming in toward the chest.

Additionally, both studies and athlete experience suggest that this muscle seems to be activated to a greater extent when the upper body and upper legs form a 90-degree angle at the bottom of the press. Basically, this means that you will want to keep the upper body upright, such as on a hack squat or leg press, and enhancing stimulation by using a powerful rep tempo, while remaining within the bottom half of the ROM.

Personally, I find the leg press to be ideal, feeling a notably greater burn when moving the seat toward the upright position, bending the legs just past a 90-degree angle at the bottom, and stopping more than a quarter short of lockout. It is recommended to switch up your stance width, remaining within the range of four inches to one foot between the heels, or up until the point where the legs begin to naturally too flare outward. Below is a basic pressing pattern geared around thorough stimulation of the vastus medialis, lateralis, and intermedius:

Olympian Quads

Rectus Femoris: The muscles located in the upper front portion of the quad are the vastus intermedius and the rectus femoris, with the latter being visible. Though these two muscles lie on top of each other, they are quite unique in terms of function. The rectus femoris is the only muscle in the quads that crosses two joints. You will find a great deal of scientific evidence showing that activation is strongest during single joint movements and very weak when hip flexion is combined with knee extension. While I am not completely sold on this notion, it does imply that many versions of presses and squats might not be ideal choices to develop this muscle. Furthermore, you will find conflicting opinions as to whether leg extensions, a key single-joint quad movement, are sufficient to stimulate the rectus femoris muscle.

While I am not qualified to solve this matter, I do believe the contraction felt in the rectus femoris during extensions mimics a sort of isometric leg lift, particularly as the hips tense during the start of the movement, and felt mostly when trying to lift the upper leg off of the seat. It is inevitable that the muscle will contract, but I find that activation is not great enough to stimulate rapid development. This correlates with many studies performed on the action of this muscle, revealing that it is not dominant during the extension function performed by the quadriceps, being activated primarily at the very beginning of an extension. Something else to consider is that bending the body at the hips places the rectus femoris in the shortened position and reduces its ability to generate power. Most apparent is that the localized pump and soreness experienced from extensions tell me that the power generated during this exercise is primarily driven by the other three quad muscles.

Nothing tops off leg development like a well-developed rectus femoris that appears as if it is about to explode out of the skin. So, how does one go about developing this muscle? The first thing to understand is that the fiber makeup of the rectus femoris is very unique, running in opposing diagonal directions that form together into what appears to be a split in the middle of the muscle. On a smaller scale, this mimics the action of both the vastus medialis and lateralis as they pull in opposing directions on the knee. Basically this means that you will want to keep the legs in front of the body when performing these variations. Moreover, this muscle acts as a sort of hip flexor and is largely responsible for bringing the legs forward, such as when sprinting. If you think about it, it is for this reason that you feel it contract quite strongly during ab exercises and to a great extent during leg lifts, specifically while keeping a slight bend in the knee.

I personally find it most effective to work this muscle by attaching a weight or cable to the ankles and performing a leg-lift type movement (rectus femoris cable leg lift), preferring to work one leg at a time. Making slight changes in the raising direction of each leg, roughly within a six-inch range from left to right, will slightly shift emphasis and form a unique contraction when performing these. Another way to blast this muscle into submission is to use a Roman chair and perform alternating leg lifts in explosive sprint-like fashion.

Imagine a sprinter when reflecting over the ideal ROM when working this region and you will find that the legs should not rise up so far that the body forms at a 90-degree angle, placing the muscle at a mechanical disadvantage. Moreover, it is essential that you maintain about a 160-degree bend in the legs throughout the movement. Overall, the result is a localized pump, fatigue, and soreness, adding up to refined development and separation in the upper leg near the hips (most apparent when lean).

Now that you understand how to use squats and presses to place specialized focus on the quad muscles, I must point out that there is much more involved. For starters, other principles must be adhered to for continual shock and stimulation of the quad region. Furthermore, like the arms, isolateral, or single-legged, movements are needed to fully bring out the potential for size, shape, and detail within this muscle group. I could probably write a series on the multiple variations of lunges (walking, stationary, horizontal, reverse, uphill, the many forms of weighted, etc.) and reveal how each will emphasize the quads in a unique way relative to ROM, positioning, and rep cadence strategies.

Of course, an individual’s fitness aspirations will dictate what balance of exercises, principles, and strategies are best suited for them. A key lesson that you should take from my articles is that the consistent execution of a prearranged combination of variables will produce a specific outcome in your quest toward muscular development. Moreover, an intelligently designed formula will allow you to realize the goal-specific results that you seek much more rapidly! The quads are very complex and, as with any muscle group, acquiring the correct knowledge is necessary to sculpt them to your liking. So, enhance your knowledge, apply it with consistency, and you will build a set of wheels that will roll over the competition!

Continue reading
Treasure Chest

Treasure Chest

Treasure Chest – The consistent application of core pressing and fly movements has allowed me to add a great deal of quality size and shape to my chest over the years. Even so, the overall development I had attained wasn’t up to my satisfaction until I delved deeper into the anatomy and function of the chest region.

Because I continually analyze workout technique in an effort to make dramatic improvements to my physique from contest to contest, I am often criticized for being far too much of a perfectionist. Yet, for those of you seeking to be the best you can be, I am sure you can relate. And if so, I have written this article with you in mind. sbotop

I certainly am not attempting to form some new fad formula and pawn it off as the next best thing, far from it! In fact, everything spoken of below revolves around the same tried-and true basic movements that you have used for years, doing so because they work. taruhan bola

Despite this, you may find some of the descriptions a bit challenging to grasp at times. If this is the case, I can promise you that if you take the time to understand these concepts, they will broaden your horizons with regard to chest training and take your development to levels that you have yet to imagine! https://www.americannamedaycalendar.com/

Treasure Chest

If you have grasped the basics with regard to proper form and core movements, the next step toward extreme chest development is to think outside the box, away from the traditional flat/incline/decline pressing scheme.

In my experience, maximizing chest development is contingent upon the incorporation of various uncommonly used angles when performing chest movements. Granted there are people out there with outstanding genetics and they can achieve exceptional development from simply sticking to the standard angles. However, this is not the case for many of us.

Before I personally started pressing from the angles between the standard flat and incline on a frequent basis, the fiber in the middle of the pectoral region appeared flat and under-developed.

After one or two years of making these angles a staple in my chest arsenal, the middle region of my pectorals had developed dramatically. In fact, my chest appears to have developed more in the last two years than in the last twelve combined simply due to building a greater amount of muscle in that region.

Treasure Chest

Everyone has a unique structure (such as the girth of the ribcage, variations in arm span, or muscle length), and to some extent this will dictate the most effective angles from which to press from. Despite this, I feel that the best angles range from a 30-degree decline to roughly 5-degrees above a traditional incline before the delts and triceps begin to work too hard.

I personally make use of every angle in this range in five degree increments, usually within four chest workouts. To ensure that the chest is worked thoroughly during each workout, I usually follow a general model of decline, flat, low-level incline, and a mid-level incline angles.

Though I always draw on this basic pattern, the very next workout, each of those angles will fluctuate by roughly five to ten degrees…and, yes, that means that I will occasionally leave out the traditional flat angle!

Consistently rotating your starting angle at the beginning of a workout will ensure that every area of fiber is worked when you are fresh, therefore leading to the greatest development in every region of the chest. Regardless of the angle I begin with,

I transition the fiber emphasis, either going “up the bench” or “down the bench” when pressing. I feel it is more efficient for the blood, and therefore the “pump,” to travel to neighboring areas of the chest. At the present time, my personal goals require me to begin with a mid-angle (roughly 10 to 30-degree incline) more often than the others, and of course, an exception is made with regard to this style of transitioning.

The reason that you adjust the angle of the bench to begin with is to target a specific region of chest fiber. Yet, this is a futile approach if used in conjunction with an improper pathway of travel (the direction that the arms move as you press the weight).

I find that many people simply adjust the angle from a decline to an incline and press horizontally straight across the body on each angle. If you find that your outer pec region is developing, but you can’t seem to stimulate the inner region, chances are you are making this mistake.

In addition to weak pectoral regions and over-emphasizing the front deltoids, an improper pathway of travel is a key factor contributing toward rotator cuff damage, especially while performing incline work. Therefore I find it best to provide a basic understanding of muscular fiber connections and design since consideration must be given to this when moving the weight relative to each angle.

Without delving too deep into anatomy, the upper chest region originates at the clavicle (collar bone) and the lower chest originates at the sternum and upper ribcage, with both muscles inserting into the humerus (upper arm). This forms a sort of fan-like design, with the lower chest comprising the majority of this shape.

Whenever you perform a chest movement, you will find it expedient to select a target region of fiber and consider the anatomical direction with which it travels from insertion to attachment point. If you are totally unfamiliar with the anatomy of the chest, it will do you a great deal of justice to view an anatomy chart, which is easy to find online, before trying to grasp the description that follows.

Complete stimulation from the upper to lower chest region will involve distinctive changes in the pathway of travel. Thinking in terms of fiber direction from origin to insertion, contracting the upper chest involves moving the arms with a slight upward motion. This is because the fiber runs from the collar bone into the armpit where it connects to the humerus, forming an upward angle.

Working the upper-mid region fiber of the lower chest will also entail an upward path of travel since it connects high on the sternum and angles upward, though not as sharp as the upper chest muscle. In general, the remaining lower chest fiber will run from the humerus horizontally across the sternum and gradually shift downward.

The lowest portion is angled in near-opposition to the upper chest, meaning that a sharp downward motion is needed for optimal contraction. On a side note, this concept should allow for greater flexibility with respect to cable flys, positioning the handles at various localities and contracting the fiber in the direction that it runs from origin to insertion.

Arm rotation works alongside angle selection and the pathway of travel to minimize the incorporation of the front delts and isolate a region of chest fiber. On a practical level, you can control this by paying attention to the degree to which the hands are angled throughout the ROM of chest movements. A great example of this is built right into the design of HAMMER STRENGTH chest machines.

If you have ever used them, you might have noticed that the handles are angled midway between the neutral and pronated position at the start of the press. Within this locality, it is important to note that the handle design tends to lean more toward pronation on the incline version and near the neutral position on the decline, allowing the elbows to move down slightly at the beginning of a press to minimize front-deltoid recruitment.

Additionally, as you press outward on any of these machines, the hands will slightly rotate toward the neutral position. This same isolation tactic can be used very effectively when performing dumbbell presses.

Generally speaking, I find that keeping the hands between the pronated and neutral position allows for the most natural isolation of chest fiber throughout the ROM when pressing. Again, the purpose of combining this tactic with the variables discussed previously is to achieve a more natural contraction in a select area of the chest.

Just as it is necessary to change the pressing angle and movement pathway to target a given region of fiber, you must also make relative adjustments the position of the hands. While the hands should always rotate toward the neutral position as you press upward, it is important to clarify that you should not use the biceps and forearm to deliberately rotate the hands during the movement.

They will slightly (and I mean slightly) rotate toward the neutral position due to the natural rotation of the arms as you press the weight, virtually remaining in the same position throughout the movement.

The ideal hand placement will shift slightly more toward the pronated or neutral variation depending on the angle used. To clarify, the hands will rest near pronation on incline dumbbell pressing movements and they will gradually shift toward the neutral position relative to dropping the bench angle down toward a decline.

The hands should still maintain some degree of pronation at the top of the movement for each angle until you begin to move below the flat angle. From the flat angle and below, you should find the hands to be approaching the neutral position, with a very subtle shift toward the supinated position at the top of the movement when the arms are extended on a steep decline angle.

I know this may be confusing, but if you try to grasp what I am describing here, it will be benefit you beyond belief! A sound way for you to imagine this, strictly with regard to hand placement, is to sit in your car, move the seat back, and grab your steering wheel. As you move from top to about the 4 and 8 o’clock locality, representing upper to lower chest, your hands will rotate from the pronated, to the neutral, to just slightly into the supinated position.

Treasure Chest

It is common for people to transfer the pronated grip variation from barbell presses over to dumbbells since they are accustomed to it. However, you will find that chest stimulation will be enhanced, while minimizing front delt recruitment, by adding the aforementioned twists to dumbbell movements.

The most obvious proof will come about when switching the wrists from the customary pronated to the neutral position on a flat or decline angle, as you will experience a major transfer of stress and much greater contraction in the lower pectoral region.

It is important to realize that, because you are taking out front delt fiber to enhance isolation of the chest region, you will inevitably press with lighter weights. Even so, performing in this manner will yield big time results!

Lastly, be sure to give a great deal of consideration to the pectoral minor region, which lies underneath the chest. This muscle attaches to the scapula (shoulder blade) and runs down to the upper region of the ribs. Hypertrophy of the pec minor will cause the outer region of the chest to flare out quite remarkably in time and you will find few exercises that blast this muscle better than the (single) dumbbell pullover.

The proper usage of positioning entails adjusting the body against gravity for the sole purpose of stimulating a given region of fiber. If you apply the basic form principles described in this article with an understanding of connection points and fiber direction, you will have a better grasp on which angles and motion pathways are optimal to stimulate a given area of the chest.

Though they encompass decades of extensive research, you might also realize that the human body is much too complex to limit yourself to the majority of mainstream regimens. If you seek to be the best you can be, you will have to expand your thought process with every bodypart to take your training to the next level. Doing so is a surefire way to guarantee that your physique will follow that same pattern!

Continue reading
Broken Chest

Broken Chest

Broken Chest – I used to envy the guys who could hit a few sets of push ups and achieve pectoral development twice as good as I could by pressing a ton of weight. This intensified when they couldn’t offer a single bit of advice as to how I could progress in that region, but I couldn’t blame them.

They didn’t need it! Throughout my weightlifting and bodybuilding career, no single bodypart has been more difficult to stimulate into new growth than my chest. This has led to much frustration given that I’ve always desired a thickly muscled pec region more than any other bodypart.sbobet88

Initially, I sprung out of the skin and bone phase by building the outer portion of my chest. From there, I learned how to position the body to tap into the fiber moving toward the inner region of the lower pecs, making my weak upper chest stand out more. sbobet88

A year or two, and a pair of over-developed front delts later, I finally learned how to bring that up…but even then, my battle was only half over. It was almost as if God was playing a decade-long prank on me! www.mrchensjackson.com

Broken Chest

Up until just recently, no fan of bodybuilding had ever complimented my chest. Surely I have more work to do, but I’m certain that I have finally devised a formula that works incredibly well.

I am going to share some very effective tips that you can apply to boost your progress in this area. Because I basically had to piece my chest together, the years of research, trial and error, and meticulous thought that I’ve devoted to build this area is going to be of great benefit to you! And who better to get them from than someone who built it from scratch!

Form is everything when it comes to stimulating the chest region! The first sign that something is wrong with your form will surface when you can achieve a pump in some bodyparts, but not others. Knowing this, if you achieve a better pump in your front delt region than you do in your chest, you have not yet formed the essential mind-muscle connection.

Practically speaking, making an effort to flex and feel the chest on a frequent basis will enhance your mind-muscle connection and boost your capability to fall into the practice of sound form when performing chest movements. Until I could effortlessly flex and feel a sharp contraction in the upper, inner, and lower region of my chest, I could not stimulate it, with all of effort going into the outer fiber of my chest and front delts.

I can state with absolute certainty that you will never maximize your potential until you can feel your chest working when performing chest movements, and this is especially true for those like myself that are not genetically blessed with dense fiber in that region.

This often entails overlooking the irrational fear of using a lighter weight until you feel it more in the chest. If you are brave enough to do so, I will bet my bottom dollar that it will respond much more and the thorough pump that you will attain, from the inner to outer and upper to lower pectoral region, will prove it to you!

The body is meant to work as a unit, and while this can be used to create a beneficial synergy on occasion, it is also the cause of inadequate chest stimulation and over-usage of the front delts when performing chest movements.

A generic model to recruit chest fiber when pressing for mass and power involves arching your lower back slightly, expanding the ribcage, and squeezing the shoulders down and back against the bench.

Watch an NFL lineman force an opponent or go and put yourself in position to push something with all of your might. In both cases, you will observe that the body naturally falls into this position.

If you were to keep the shoulders down and back when performing every chest movement, in time you would notice that the inner region, near the sternum, would appear under-developed. Anatomically, that particular position pulls the humerus back and stretches the chest from its origination on the sternum, which is ideal for generating the most power and for overall mass building.

Conversely, you can work the chest with reaching-like movements, bringing the shoulders forward and the arms across the body through the top half of the ROM. Doing so will generate a super-strong contraction and shift emphasis toward the inner fibers, aiding toward the maximization of shape and detail in that region.

To achieve thorough development, both form variations must be incorporated in your regimen on a consistent basis. A very basic model would be to divide each chest workout by ROM.

This means working the first half or three-quarters of the ROM with presses, with the shoulders rolled back, and following that up by working the top half with cable flys and machine movements, where the shoulders come forward as the arms reach across the body.

Once you grasp the basic mind-muscle connection and form concepts, you simply need to select the appropriate pieces of equipment and begin construction. Given that many great champions profess the usage of one apparatus over another, this can lead to a great deal of confusion.

I have given this quite a bit of thought, and in part 2 of this series (Tool Chest) I am going to help you select the right tools for the job!

Continue reading